I was given some really good advice many years ago: don't draw attention to your flaws, it makes people notice them.
For example: a fellow blogger I admire recently mentioned that she has always hated her nose. I don't think there is anything wrong with her nose, and it never stood out to me, but now I find myself looking at her nose.
Where am I going with this? This blog title is about high heels.
Okay - I am 6 feet tall and proudly wear high heels. I love them, they're gorgeous and make me feel good. My response to the all too frequent comments of "why do you wear heels when you're already so tall" was always "I'm tall with them or without them so it doesn't matter. I love them and am wearing them".
Why, oh why, do people think it is okay to comment on a tall woman's footwear choice? Why?! I'd never say to an overweight person "You're already so big, why wear leggings as pants which makes you look bigger?". I would NEVER say that, and am a bit embarrassed to have even typed it!
Lately I have been wearing only flats in my posts and am starting to feel self conscious about it. I would hate for other tall women, especially young women who may still be getting comfortable with their height, to think I don't wear heels or think that tall women shouldn't wear heels.
My reason for wearing only flats lately is because I have a chronic leg problem , which is currently more problematic than normal and wearing high heels exacerbates the pain (left leg pseudarthrosis with neurofibromatosis for all you Orthopaedic Surgeons and related medical professionals who I am sure follow my blog. Or not.). So thanks to a dodgy leg I'm in flats of late.
I hope to be back in my high heels soon and will be wearing them with pride! Of course, no one may have noticed that I've only been wearing flats...
Thursday, 30 July 2015
Monday, 27 July 2015
I Made It Monday - Dress to Skirt Refashion
This is a really easy refashion! Perfect if you're learning to sew because it's just that easy!
I took a too short halter neck dress that was given to me and turned it into skirt.
I could have worn the dress as a tunic top, but I don't wear halter tops. I did love the fabric with it's gorgeous olive green colour and cool print.*
I simply used wide elastic as the waist band - I liked the contract of the black with the fabric.
Here is how I did it:
1. Determine how long you want your skirt to be; measure that length from the bottom up. This way you can use the original hem - easy!
2. Cut. I cut the dress to give myself a below knee length skirt and to make the most of the fabric print. Finish the raw edge.

3. Take 5cm wide elastic which is the same as your waist measurement (don't make it too tight as that can give even the skinniest girl muffin top!). Sew the edges together to form a circle.

4. Matching right sides of skirt and elastic together pin at 12 o'clock, 3 o'clock, 6 o'clock and 9 o'clock. The elastic will be smaller than the skirt.
5. Using a zig zag stitch sew the elastic to skirt, stretching as you go so the elastic lays flat on the skirt.

Ta da! You're done! You have a fabulous new skirt and you only had to sew one seam!

*Caution: cutting up dresses to make skirts can be addictive... I've already converted 3 rarely worn dresses into skirts that are destined to be favourites!
Monday, 20 July 2015
I Made It Monday - Wide Leg to Joggers Refashion
Whenever I'm not 100% sold on a trend I'll make / refashion it myself first before spending any money on something I may fall quickly out of love with.
If you follow me on IG you will have noticed that my style is fairly classic. I do occasionally like to try new trends, but I always go back to the classics.
The joggers trend for example. I like the look on other people, but wasn't sure about it for me. Plus if I wanted a pair which was long enough I'd have to buy them online and I wanted to try them on first. Oh the drama!
So I took a pair of wide leg pants that I wasn't that fussed on and refashioned them.
Here's how I did it:
1. Try pants on inside out & pin inside seam to desired width. I started just above my knee and worked my way down.
*Important tip* - make sure you leave the ankle opening wide enough to get your foot out! I may or may not have (totally did) pinned myself into my pants then couldn't get them off.
2. Sew along line of pins & try them on again to ensure you're happy before cutting off the excess fabric. Finish seams.
3. I added cuffs to the bottom of my pants rather than just making a casing to tread elastic at the bottom. This gave me some extra length. The cuffs I used were knit fabric.
Ta da! An easy refashion from old wide leg pants to joggers.

I've already worn these pants more in their new life as joggers than I ever did when they were wide legged.
Have you embraced the joggers trend?
If you follow me on IG you will have noticed that my style is fairly classic. I do occasionally like to try new trends, but I always go back to the classics.
The joggers trend for example. I like the look on other people, but wasn't sure about it for me. Plus if I wanted a pair which was long enough I'd have to buy them online and I wanted to try them on first. Oh the drama!
So I took a pair of wide leg pants that I wasn't that fussed on and refashioned them.
 |
| Top: Long Tall Sally / Necklace: Made By Me Pants: Made By Me / Shoes: Target |
Here's how I did it:
1. Try pants on inside out & pin inside seam to desired width. I started just above my knee and worked my way down.
*Important tip* - make sure you leave the ankle opening wide enough to get your foot out! I may or may not have (totally did) pinned myself into my pants then couldn't get them off.
2. Sew along line of pins & try them on again to ensure you're happy before cutting off the excess fabric. Finish seams.
3. I added cuffs to the bottom of my pants rather than just making a casing to tread elastic at the bottom. This gave me some extra length. The cuffs I used were knit fabric.
Ta da! An easy refashion from old wide leg pants to joggers.

 |
| Photos c/o of wonderful Husband |
I've already worn these pants more in their new life as joggers than I ever did when they were wide legged.
Have you embraced the joggers trend?
Monday, 13 July 2015
I Made It Monday - Pencil Skirt with Leopard Accent
On todays "I Made It Monday" I'm wearing a basic black pencil skirt that I made with a little leopard flare.
I love leopard print but in my wardrobe I only have it in shoes, scarves, belts & bags. I love leopard on other people in the form of skirts, dresses and jackets but just don't think it works for me.
So I've found a way to add a little more leopard print to my wardrobe. For me this is a happy medium; it's still my basic black staple but it's a bit more fun and interesting with the addition of the leopard print. Maybe this is me taking baby steps towards an actual piece of leopard print clothing!
This is an easy technique you can use to add some colour or pattern accents into your wardrobe if you're like me &too chicken conservative not ready to go all in!
Here's how to do it:
 1. Take a pencil skirt pattern or existing pencil skirt like I did & trace to get front and back pieces. (Take into consideration the amount of stretch your fabric has). Add allowances for seams, waistband casing and hem.
2. Deciding how wide you want your accent strip to be (e.g. 10cm) deduct 5 cm from each side on both front & back pieces.
3. With right sides together sew the accent strip to front & back pieces.
4. Make a casing for your waistband elastic. Thread elastic & close casing.
5. Hem your skirt to desired length.
Ta da! You have a fabulous new skirt!

 |
| Top: Long Tall Sally / Skirt: Made By Me / Shoes: Diana Ferrari |
I love leopard print but in my wardrobe I only have it in shoes, scarves, belts & bags. I love leopard on other people in the form of skirts, dresses and jackets but just don't think it works for me.
So I've found a way to add a little more leopard print to my wardrobe. For me this is a happy medium; it's still my basic black staple but it's a bit more fun and interesting with the addition of the leopard print. Maybe this is me taking baby steps towards an actual piece of leopard print clothing!
This is an easy technique you can use to add some colour or pattern accents into your wardrobe if you're like me &
Here's how to do it:

2. Deciding how wide you want your accent strip to be (e.g. 10cm) deduct 5 cm from each side on both front & back pieces.
3. With right sides together sew the accent strip to front & back pieces.
4. Make a casing for your waistband elastic. Thread elastic & close casing.
5. Hem your skirt to desired length.
Ta da! You have a fabulous new skirt!

 |
| Photos c/o my wonderful Husband Who loves an action shot! |
Friday, 10 July 2015
Adding Length to a Top
The colour black is my one true clothing love and I wear it most often but I just can't resist green. Emerald, Kelly, whatever you call it - I love it!
When I was in the USA a few years back and saw a fabulous green hoodie on clearance at Old Navy for less than $10 I had to have it. Sure it was a little short, but I told myself the lie that every tall girl tells herself... it's not that short (unless I move!) & I can stretch the sleeves. Then it shrank in the wash. Whoops.
So rather than give it to a short friend I decided to make it work by doing some colour blocking with navy Ponte fabric I had left over from making this midi skirt.
It's a simple fix!
Cut off the wrist bands and bottom band - carefully as it will fray!
Sew in fabric which is the same width as the original piece and your desired length. If the top you are adding to is a stretch fabric, then add in stretch fabric. If it's a woven fabric, then use woven fabric.
Use a zig zag stitch if your top is stretchy and finish the edges.


A little tip: make sure your wrist bands are the right way around when you reattach them. One of mine is backwards which bothers me, but not enough to fix it!
Ta da! Now I have a colour block hoodie which actually fits.
I don't know about the other tall girls out there but I feel much more comfortable when my sleeves are actually long enough!
When I was in the USA a few years back and saw a fabulous green hoodie on clearance at Old Navy for less than $10 I had to have it. Sure it was a little short, but I told myself the lie that every tall girl tells herself... it's not that short (unless I move!) & I can stretch the sleeves. Then it shrank in the wash. Whoops.
So rather than give it to a short friend I decided to make it work by doing some colour blocking with navy Ponte fabric I had left over from making this midi skirt.
It's a simple fix!
Cut off the wrist bands and bottom band - carefully as it will fray!
Sew in fabric which is the same width as the original piece and your desired length. If the top you are adding to is a stretch fabric, then add in stretch fabric. If it's a woven fabric, then use woven fabric.
Use a zig zag stitch if your top is stretchy and finish the edges.


A little tip: make sure your wrist bands are the right way around when you reattach them. One of mine is backwards which bothers me, but not enough to fix it!
 |
| Jean: Refashioned by Me / Booties: Target Photos c/o of wonderful Husband |
Ta da! Now I have a colour block hoodie which actually fits.
I don't know about the other tall girls out there but I feel much more comfortable when my sleeves are actually long enough!
Monday, 6 July 2015
I Made It Monday - Another Midi & Great Fabric Find!
Welcome back to "I Made It Monday"!

I really should have named this blog "The Tall Mama & Her Midi" because I love them & hope you do too!
This midi skirt is made from my basic midi pattern with 2 box pleats in the front and back (see tutorial here).
I often get asked where I find my fabrics. I buy most of my fabric from The Remnant Warehouse; I'm in no way affiliated with them (but would love to be - I'd make you proud The Remnant Warehouse!!). I love their selection, quality and most importantly price! Check them out online.
I am also lucky enough to be gifted fabric from people who know I sew and have a love & appreciation of vintage fabric (examples here and here).
However you don't have to limit yourself to fabric stores when looking for fabric, inspiration can strike anywhere! This gorgeous yellow & grey geometric fabric started its life as a doona (duvet) cover at Target! Yep, I saw this in the bedding section and thought "why can't I find fabric like that for a midi skirt?". Duh! It is fabric and I can turn it into a skirt with plenty to spare!
So the moral of the story is: when shopping for fabric don't limit yourself to fabric stores or feel discouraged if you don't have good fabric stores in your area. Keep an open mind and great fabrics can be found anywhere!

 |
| I made a centre back zip in this skirt with 2 box pleats. |
 |
| I do wish I'd take the time to match the triangles on the side seam, but I was rushing to finish the skirt to wear to a baby shower. Photos c/o my wonderful Husband |
I really should have named this blog "The Tall Mama & Her Midi" because I love them & hope you do too!
This midi skirt is made from my basic midi pattern with 2 box pleats in the front and back (see tutorial here).
I often get asked where I find my fabrics. I buy most of my fabric from The Remnant Warehouse; I'm in no way affiliated with them (but would love to be - I'd make you proud The Remnant Warehouse!!). I love their selection, quality and most importantly price! Check them out online.
I am also lucky enough to be gifted fabric from people who know I sew and have a love & appreciation of vintage fabric (examples here and here).
However you don't have to limit yourself to fabric stores when looking for fabric, inspiration can strike anywhere! This gorgeous yellow & grey geometric fabric started its life as a doona (duvet) cover at Target! Yep, I saw this in the bedding section and thought "why can't I find fabric like that for a midi skirt?". Duh! It is fabric and I can turn it into a skirt with plenty to spare!
So the moral of the story is: when shopping for fabric don't limit yourself to fabric stores or feel discouraged if you don't have good fabric stores in your area. Keep an open mind and great fabrics can be found anywhere!
Saturday, 4 July 2015
Fabulous Separates
In my post on Monday (check it out here if you missed it) I talked about how I sometimes make a top and skirt out of the same fabric to maximize my wardrobe. When I wear them together they look like a dress, but I have the benefit of wearing them as separates.
This genuine 1970's polyester fabric which was lovingly gifted to me was so fabulous I wanted to make the most of it! I usually dislike synthetic fabric, but who can pass up genuine 1970's polyester?! Fabulous!
Here is the matching top and skirt:


Here is the top with a denim pencil skirt (also made by me):
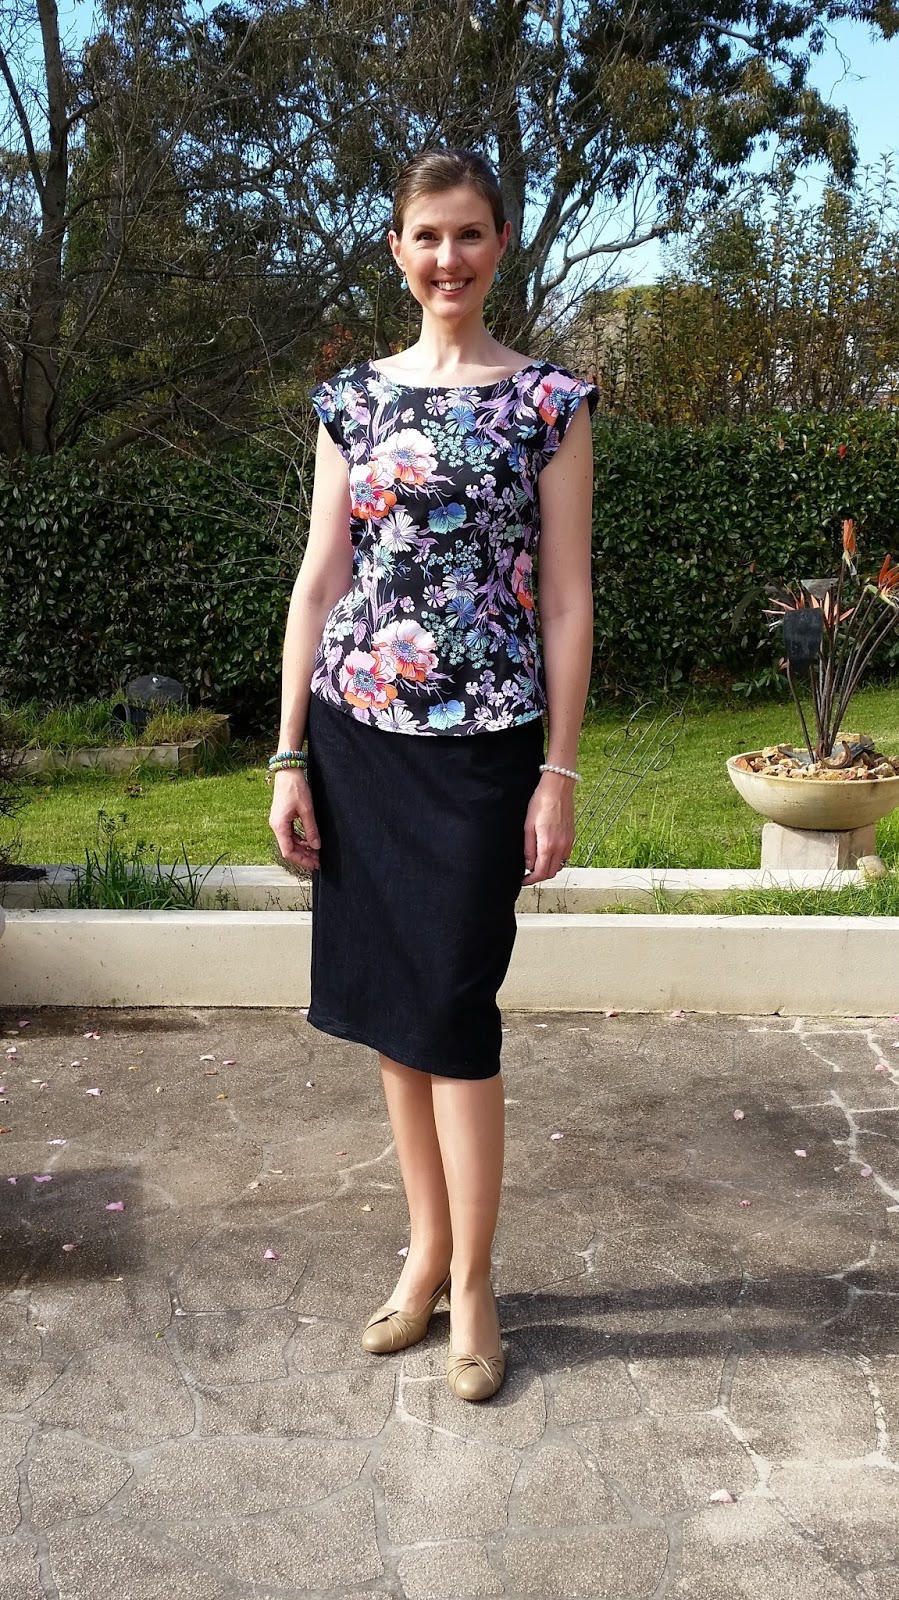 |
| The top is New Look Pattern 6194 with the neckband omitted & length added (but that's just a given for me, right?!). |
 |
| Photos c/o of my wonderful Husband |
Wednesday, 1 July 2015
Letting Down A Hem Tutorial
Do you have a skirt (or pants) that you feel is just a little too short?
Here is a simple way to let down the hem for extra length. As a tall girl I need to do this a lot!
I've used a skirt here for my example. You will notice that I've used a bright blue fabric, of course the sensible thing to do would be to use a coordinating fabric but I like the secret pop of colour inside my skirt!

1. Unpick the hem to see how much extra fabric you have to work with. Press the hem flat using the highest iron setting the fabric will tolerate. I place a slightly damp cloth over the hem when pressing.
2. Take a scrap of fabric the same width as your skirt (or pant leg) and at least 5 cm high to give a nice finish.
3. With right sides together machine sew the fabric to the bottom edge of your skirt.
4. Fold under 0.5cm and sew along the raw edge of your added fabric.

5. Press the seam up towards the bottom of the skirt so your added fabric sits on the inside and not at the very edge of the skirt.
6. Invisible hem (I prefer to do this by hand) and you're done.


Ta da! A little extra length that goes a long way!
Subscribe to:
Posts (Atom)