Home

Showing posts with label style. Show all posts

Wednesday, 29 March 2017

#SewTallAndCreative2017 Inspiration & Intention


I find inspiration in many places; from RTW (ready to wear) clothing I see online & in stores, from the fabulous & fashionable I follow on IG (I'm sure that includes you!) to the gorgeous vintage patterns that I hoard collect, my favourites being the 1950's & 60's.

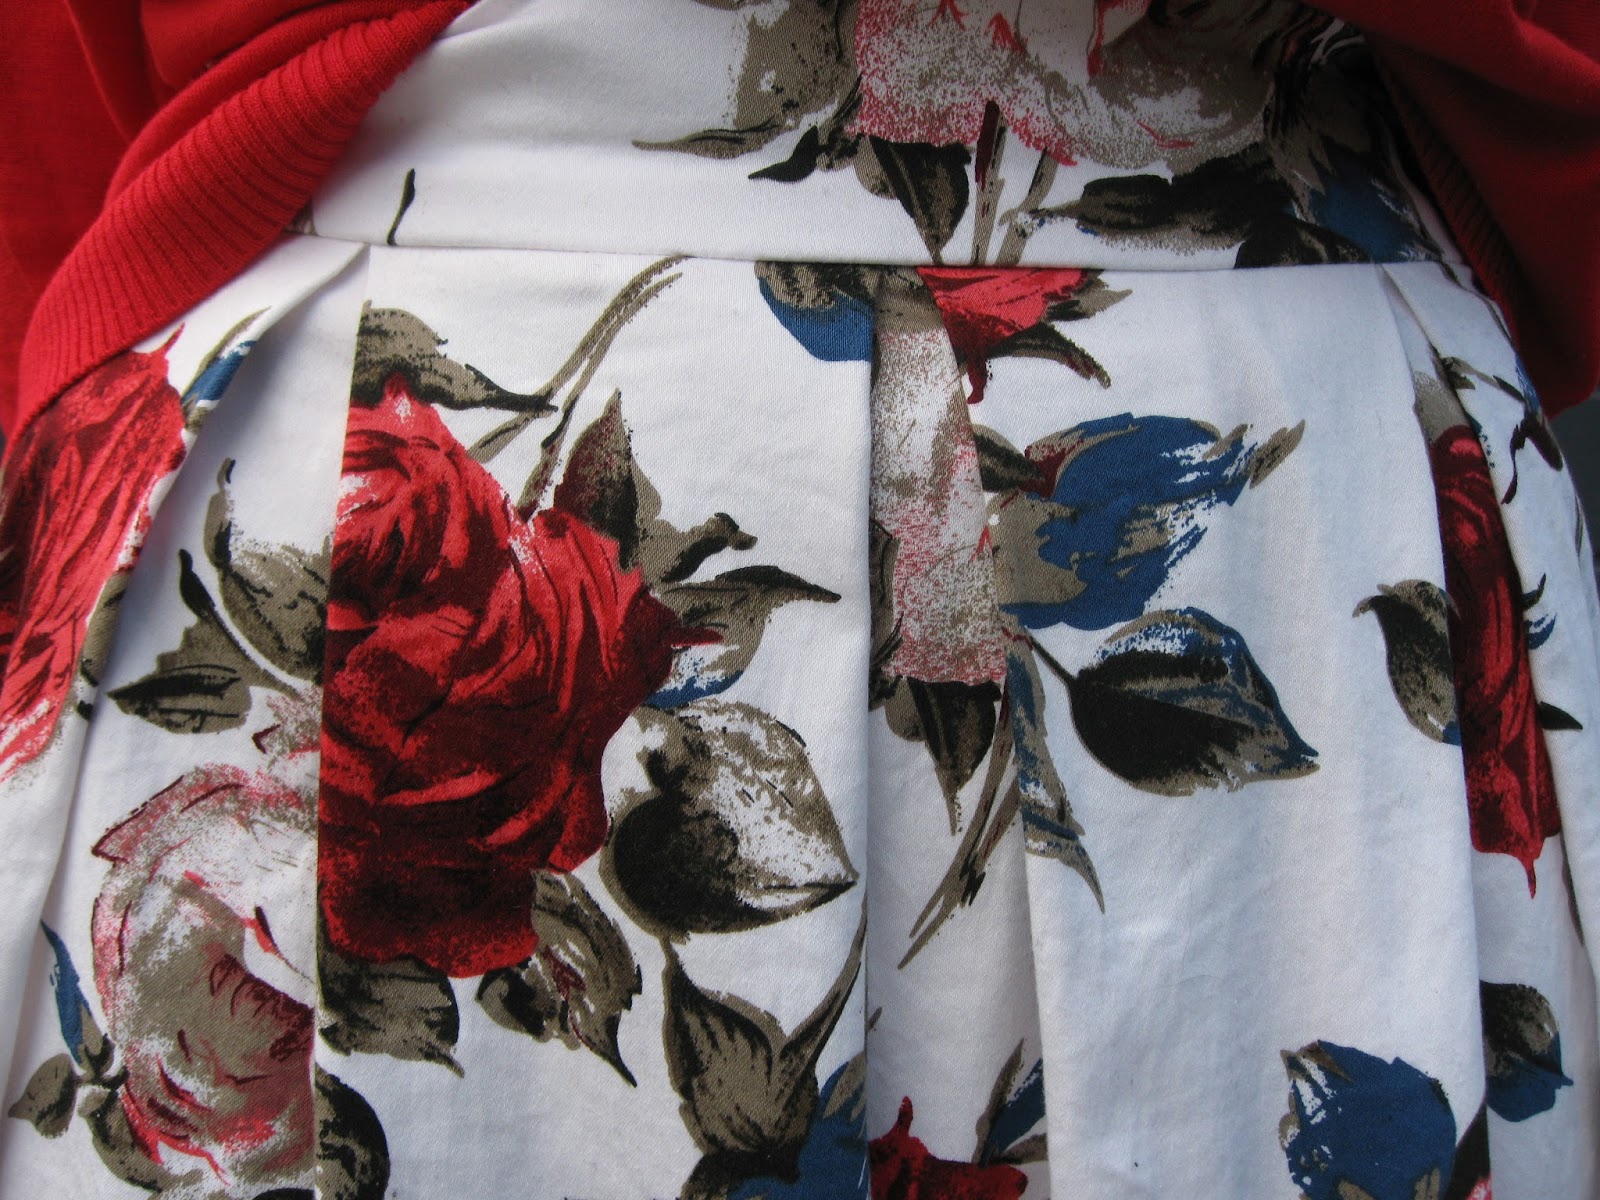
Inspiration can also come from gorgeous fabrics.  You can look at and fondle (I know that sounds a bit creepy but anyone who sews gets it!) fabric and envisage the garment it could become.

When I received the box of gorgeous fabrics from MARGE my mind went into overdrive.  My original thoughts for a design went out the window as they didn't lend themselves to the soft drapey goodness of these fabrics.  Also, part of the challenge is to use 2 different fabrics which adds another creative element to my typically basic style. 

Although I've not yet settled on a design, I know I will stick to elements that are consistent with my personal style and flatter my shape, such as a full or A line skirt at or below the knee, defined waist and fitted bodice.  That leaves things pretty wide open, doesn't it?!  Yep...hence my challenge! 

Here are a few style ideas I have been bouncing around (images from Google Images):

Love the lace sleeves here!

Love the sleeves & skirt fullness!

Love the sheer top and defined waist!

This dress just looks like it would
swish when you walk!
 
Love, love, love! Just need to
figure out how to make it!

Hmmm...there is a pretty common theme there!! 

I will update you with my design ideas when I figure out how to best incorporate 2 gorgeous fabrics. 

Please feel free to make any suggestions, all helpful ideas welcome!

Monday, 20 March 2017

MARGE / Tall Guides Design Challenge #SewTallAndCreative2017


I am equal parts excited and terrified to be participating in the MARGE and Tall Guides design challenge.

The challenge is to make a Spring / Summer dress using 2 fabrics generously gifted by MARGE clothing.  Having been the lucky beneficiary of MARGE fabrics before, I knew I couldn't resist the opportunity to sew with their stunning ethically made fabrics.  Who could?! 

I thought I'd try something a little different and introduce myself and my super high tech & glam sewing space (otherwise known as my kitchen table & 40 year old sewing machine!) with a little video:

Please check out the other fabulous participants in this challenge.  All of whom I'm trying to put out of my mind because I'm intimidated by their awesomeness!

Beth at www.sewdiy.com
Janet at www.diywardrobe.co.uk
Tiffany at www.prettytallsewnsew.com

I will update you on the challenge as it unfolds, so be sure to check back!  The winner will be announced 20th of May (*big gulp* that's sooner than you think my lovelies!!).

Wish me luck!


Thursday, 19 January 2017

First Make of 2017! B6333

Happy New Year!

Despite the busy past couple of months (turning 40, best friend visiting from New York, Christmas, school holidays etc) I did manage to squeeze in some sewing.

My first make of the year is Butterick 6333, a classic shirt dress.

Overall experience:

The pattern says that it's easy, and it is.  Maybe not for a beginner, but an easy sew for those with some experience and a good way to learn new skills (collar and buttons) for newbies.

My adjustments:

I added 23 cm (9 inches) to the skirt length as I wanted it to hit below the knee.  Based on my measurements I added 1.5cm to the bodice length, however had to remove it.  Then I entered a sizing parallel universe...I cut out the size which corresponded with my measurements but it was huge!  I ended up taking out about 5cm (2 inches) on either side and bringing in the shoulders 2cm (almost an inch) as they hung off my reasonably average shoulders. 

Does this happen to anyone else?  You cut out your size based on the pattern measurements, but then it's huge?  Oh well, better too big than too small I guess!

Fabric used:

I used a gifted cotton lawn.  The fabric is very lightweight so I lined the front of the bodice (not in the instructions).  I possibly would have lined the skirt, but ran out of lining fabric!  After having worn it, I think it's fine without lining.

Would I make it again?:

Yes.  I love the timeless classic style and it has pockets (which, as you know, I add to just about everything but it was nice they were part of the design!).  Despite all the adjustments I had to make it was worth it and will be much smoother sewing next time. 

Happy Sewing!!


Saturday, 19 November 2016

Muslin Magic!

Okay, so "muslin magic" is a bit of an overstatement for the title of this post!!

However, this is a favourite trick of mine when making muslins out of scrap fabric. 

When I'm using a new dress pattern for the first time the fit of the shoulders, bust and waist is most important to me.  Typically I'm making a full / flared skirt so my butt can be as big as it wants to be and the skirt portion will fit!  However, I have to more carefully consider the fit of my upper body (which is sometimes up to 2 sizes smaller than my lower half!). 

Rather than using up lots of fabric to make a muslin of the skirt, which I know will fit, I make just the top.  If the muslin works out I have a lovely new top to wear with jeans or a skirt.  If it doesn't work out, I haven't wasted many metres of fabric.

Here are 2 examples of my top half muslin making magic!

The first is The Rosie Dress by Cotton & Chalk.  I used a rayon purchased from my Church fĂȘte, sadly there wasn't enough to make a whole dress.  I was between sizes so went with the larger size.  Mistake!  It was huge, so huge that I think I lost some of the original shape taking it in.  The neckline is designed for a more endowed woman than I, so I had to take that in too.  All in all, if the fabric wasn't so pretty I'd probably discard this one.  I really don't see myself making the dress, which is a shame because I've seen fabulous versions of it on Instagram.  Who knows, maybe I will give it another go...


No idea what I'm doing here.  Clearly, I'm a professional model!

Pretty fabric!

The second top is The Olivia Dress also by Cotton & Chalk.  I was much happier with this one and have since made it into a long sleeved maxi dress.  For this muslin I used a cotton lawn which was gifted to me.  I didn't have to make any tall girl alterations for this one!


The shot everyone who sews can relate too
 - tucking in a loose thread!

Monday, 8 February 2016

Me Make Remake.

What's a "Me Make Remake" you ask?!


It's when you make something, are not happy with it, never wear it, so you remake it!  Also case in point as to why you should make a muslin (practice version out of cheap fabric) first! 
Original version of the dress


I made this dress 6 months ago and despite loving the fabric, I only wore it once.  The neckline was too open and weird for my shape.  And the sleeves were just a bit too much with this big graphic print.  You can see the original dress here


To remake it I simply cut the front bodice out (the dress was also a bit too big so I had plenty of fabric to work with) and cut a new front bodice using New Look pattern 6262.  I chopped off the sleeves, but kept them in case I decide to reattach them come Autumn (perhaps I should just call this the "Indecision Dress"??!).  I finished the sleeve opening with bias tape. 


And Ta da!  A dress I have already worn twice in the past few weeks! 


New and improved dress!
 
Teamed with a cardigan for Church
Photos c/o my wonderful Husband

Monday, 28 December 2015

I Made It Monday: My Christmas Dress.

For my Christmas dress I decided to brave knit fabric.  A fabric that has  previously struck terror into my heart due to many failed attempts sewing with it.


I had always used my trusty old 1960's Lemair machine, however it skipped stitches and looked a mess.  I was using the correct needle, but the results were terrible.  When my Mum gave me her 1976 Bernina 807 I decided to give knits another try.  And it worked!  No skipped stitches or breaking stitches, happy days!  I even used a double needle for the hem with no dramas!

I had this lovely red organic cotton jersey in my stash which was just asking to be a Christmas dress!  I found this free pattern online by So Sew Easy, which promised to be simple, and it was! 

I didn't make a muslin, so the fit is not perfect.  I would have liked the shoulders to be slightly wider, but other than that I am happy with it.  I didn't have to add length to the bodice, which is unusual for me.  If you're not tall or don't have a long body you may need to shorten it.  I did add length to the skirt (standard!).

To dress it up a little I added some vintage sequin trim from Nona's stash.  It's actually a dark brown, but looks black from a distance. 

Friends on Instagram had been telling me how easy sewing with knits was, and they were right.  I just needed a machine that could handle them! 

Photos c/o my wonderful Husband

Thursday, 15 October 2015

Dress as Skirt

Do you sometimes see something so simple that you wonder why you didn't think of it?! 

I've seen lots of bloggers lately wearing dresses as skirts or tops.  Why didn't I think of that?!

This red pleated dress is another from my Mum's 1970's collection.  However, for my everyday wardrobe this red dress was a "bit much".  So I added a chambray shirt and now I feel like I can wear it out in the daytime without people wondering "where is she going?".

Of course I am wearing satin bow heels, but why not?! 


Photos c/o my wonderful Husband

Monday, 5 October 2015

I Made It Monday: DIY Circle Skirt

Welcome back to "I Made It Monday"!

Last week I made a couple of circle skirts for my little girls.  They loved them because nothing is more twirly than a circle skirt!  Which got me thinking: I don't have a circle skirt.  As you all know, I have a lot of pleated midi skirts and am now the proud owner of 2 maxi skirts, but no circle skirts.

That very same day that I had the "no circle skirt" revelation I was hunting for vintage dress patterns at my local Salvation Army and saw a pretty blue and green chambray meets gingham round table cloth.  A round table cloth could be turned into a circle skirt, right?!  The worst part, hemming, was already done!  For $3.00 I was going to give it a try! 

Now the internet does not need another circle skirt tutorial so I'm not going to give one.  Plus, I made so many mistakes with what should have been a very simple and straight forward project that I don't feel like I'm in a position to write a tutorial.

First I was going to put in an exposed elastic waistband, and cut the centre circle accordingly (to fit over my hips).  Then I decided that a waistband with a zipper would look more polished.  I had cut such a huge circle (clearly my mathematics was off) that I was able to cut a waistband out of the off cut.  I sewed that to my skirt and sewed in a zip... however I had failed to try the skirt on (BIG mistake) and when I put it on it fell right off.  Sigh... it was a bit big! 

At this point I was ready to re-donate it to the Salvation Army, but I refuse to be beaten.  So I unpicked the zip, which just made me begrudge the skirt more, and sewed up the hole and threaded elastic through the waistband.

If you've stuck with me through this ranting comedy of errors I commend you!  Basically what was going to be an elastic waisted skirt took some time consuming and frustrating detours just to end up being an elastic waisted skirt.  If it wasn't so pretty I wouldn't have stuck with it!


Top: Refashioned by Me (coming to blog next week) / Skirt: Me / Sandals: Big W

And you can't help but twirl like a little girl in a circle skirt!


Photos c/o my wonderful Husband

Friday, 18 September 2015

The Most Versatile Dress in the World!

Okay, I know that saying this is the most versatile dress in the world is a big call.  But it is!


I have talked about my love of animal print but felt it was "too much" on me in big items, but this gorgeous dress c/o Omika Australia solves that problem.  The black & grey print is subtle enough that I don't feel overwhelmed by the print, nor do I look like a tall walking stuffed toy!

I was a little unsure about how a knit fabric dress would look on me, however this dress is a nice thick fabric which doesn't cling - oh happy days - and it's comfortable!  And can we talk about the length?  Perfection!

I've styled it 4 different ways here, but it has endless possibilities.  I love how it is great for my everyday casual Mama life, but also looks good dressed up for a night out or for work.

If you hurry Omika Australia is now offering 10% off dresses (ends tomorrow) so now is a great time to buy one! 

Shoes: Michael Kors (old); Clutch: Coach (even older); Necklace: Sportsgirl

Ready for Date Night!
A work appropriate look.

Shoes: David Jones (old); Jacket: Cue Australia (old)


Booties: Target (old); Cardigan: Old Navy, Tall (old); Scarf: Seed (really old)

Perfect for Spring or Autumn!

Mama casual, this dress is the perfect length for chasing little people!


Shoes: Target; Shirt: Lee Cooper: Necklace & Earrings: Made By Me

Photos c/o my wonderful Husband

How would you style this dress?

Monday, 14 September 2015

I Made It Monday: Printed Pants Refashion


I was recently shopping at Big W and saw these pants on the clearance rack for $5.00!  I was immediately attracted to the soft fabric and the pretty blue print. 

Problem:  they weren't my size.  But that has never stopped me before! What was most important was that they were LONG - really long (due to the larger size I guess).

Here is the before shot (sorry, it was a sunny morning!):


Please note: I am in no way mocking wearers of these pants;
I'm simply demonstrating how they were not close to my size, making this an extreme refashion.


As I had plenty of fabric to work with I wasn't very delicate with my refashioning.  I cut up the inseam and the crotch seam.  I didn't want to take them in from the sides because they have pockets... and why would you mess with pockets?!  Also, the depth of the rise (crotch seam) was too long for me and by taking it all in I gave myself extra inseam length - bonus!

Here is how I did it:


I'm loving my new pants!!  Teamed here with a simple white tee, green earrings and tassel necklace (both made by me) and my super comfy Naturalizer sandals from last summer.


Photos c/o my wonderful Husband

Friday, 4 September 2015

Midi Skirt Love!

I love this midi skirt! 

If midi skirts were like children then you shouldn't have a favourite.  But they are not, and I do! 

If you follow me on IG you would have seen this skirt before.

I've paired it here with a loose fitting top, I like the casual and comfy look.  I made this skirt (see how here) with gorgeous cotton sateen from The Remnant Warehouse.  It is so soft!


Close up of the pleats and beautiful fabric.

Photos c/o my wonderful Husband.
My 3 year old was too busy riding her bike!

Monday, 31 August 2015

I Made It Monday: Green & White Midi Skirt

In honour of Spring starting tomorrow I wanted to make a new midi skirt. (any excuse, right?!) 

When I saw this gorgeous green and white stripe online from The Remnant Warehouse I knew it was just what I had been looking for.  I've wanted a striped midi for a while and I simply can't resist green.

As you have come to realise, I have a thing for midi skirts (see here, here and here).  I just love them, they are flattering, girly and easy to make (see here).

It won't really warm up here for a few weeks so I've teamed it here with a cable knit jumper (sweater for those who don't speak Australian) from Tommy Hilfiger that I've owned for many years.

I see myself wearing this skirt with a simple white tee and sandals for summer and am looking forward to it!


Photos c/o my talented 3 year old daughter!


Forgive the selfie, my photographer quit on me!
At least you can see the outfit details!


Saturday, 22 August 2015

Styling Boyfriend Pants 4 Ways

These pants were a happy mistake! 

I ordered them online from Old Navy for my husband, he's had previous pairs, but these were way too tight in the legs for his muscular thighs... like jeggings too tight, and that's not a good look for a man!

No free shipping or returns when you live in Australia!  So I kept them. 

I love the relaxed boyfriend style, the slight drop crotch (they are for a man!), the 36" inseam and the colour is perfection! 

For reasons unknown a woman can get away with wearing men's clothing but eyebrows sometimes raise if a man is wearing something made for a woman.  Obviously cut and fit is different for the genders, but if you find something you love & it fits you well it really doesn't matter if it's "male" or "female".

Enough about my thoughts on gender specific clothing... this post is about my new pants!

Just a proud Mama note: all of these shots were taken by my 3 year old daughter!  Forgive some of the creative angles!


I've offset the pants with a lace tee (from Big W, on sale for $1), leopard belt (made by me)
& some red heels (old Steve Madden)


She went for a bit of an action shot here, but you can see the detail of the lace &
leopard belt.
Still can't believe I got this top for $1!!!


More of a casual look with flats from Target and a tee from Mix Apparel
(on clearance at Coles) for $2! 
I've been on a roll with the bargain tops!

Being repeatedly told "Mama, you look so BOOOOtiful" does not get old.  Ever.


Another action shot!  My daughter was standing on a milk crate!

I'm trying out the half tuck.  Don't know how I feel about it. 
My head got cut off here, but hey, she's 3!

This pink gingham shirt (made by me) is the softest crinkly cotton, it's FAB! 


Then my photographer got distracted by a bird...


Wishing I'd cleaned my sneakers before photographing them... oh well, this is real life!

If you follow me on IG you'll have seen me wear this Lee Cooper shirt a LOT. 
I love it, it's old & really soft.  Paired it here with canvas sneakers from Target for an everyday casual look.

Photos c/o my wonderful & fabulously talented 3 year old daughter 
(typical overly proud Mama here!). 
Hubs may be out of a job!


Raid your husbands closet or when next shopping check out the men's department - you may just be surprised!