I really do hope this little blog of mine will inspire others to sew and to refashion.
For all of you starting to venture into the wonderful world of sewing, I thought I'd share my top 5 tips.
1. Carefully consider your sewing machine choice.
If you're starting out and can borrow a sewing machine, great! If you choose to buy your own you will most likely get an instructional DVD with it, which is handy, but please remember you get what you pay for. A few years ago I was machine-less and was not in a position to spend a lot. When I saw a basic Singer machine at Aldi for $99.00 I bought it. Mistake. Please don't get me wrong, Singer makes great machines (although I'm a Bernina girl from way back) however this is not one of them. I was constantly having tension problems which would be confusing and frustrating to a beginner. They were frustrating to me too, but I can fix them quickly! Often a well restored/serviced older machine will be better than a plastic fantastic new cheap machine.
2. Choose your fabrics carefully.
This doesn't mean spending vast amounts of money on stunningly made luxury fabrics (not recommended for a beginner!). What it means is if you're making something that should be soft and flowing, then choose soft flowing fabric. If you use a cheap stiff fabric you won't be happy as you'll end up with a stiff garment!
3. Start simply.
As much as I personally love making simple garments by tracing existing pieces, I think someone new to sewing should start with a simple paper pattern. A paper pattern will give you exact measurements and clear ,precise instructions. Start with a very basic skirt or top without too many fastenings or details. Sure you want to make a Burberry inspired lined trench coat... but start small!
4. Trim threads & finish edges as you go.
It may seem like a simple and unimportant thing, but not being left with a mess of threads and unfinished seams at the end of a project is great.
4. Iron!
Yes, you must! Press each seam. It will give you a more professional and precise finish and sets your stitches. If something is wonky, it will be obvious when you press it and you can fix it before moving onto the next stage.
5. Make sure you wear your makes.
At first you may feel a little discouraged because your garment isn't "perfect" but you are your own worst critic. Remember, when you're wearing something no one can see the messy inner seams, nor do they know how many times you had to unpick and resew. They see a lovely unique garment. Trust me, nothing feels better than being complimented on something you have made!
Happy Sewing!
Showing posts with label Sew Easy. Show all posts
Showing posts with label Sew Easy. Show all posts
Wednesday, 9 March 2016
Monday, 28 December 2015
I Made It Monday: My Christmas Dress.
For my Christmas dress I decided to brave knit fabric. A fabric that has previously struck terror into my heart due to many failed attempts sewing with it.

I had always used my trusty old 1960's Lemair machine, however it skipped stitches and looked a mess. I was using the correct needle, but the results were terrible. When my Mum gave me her 1976 Bernina 807 I decided to give knits another try. And it worked! No skipped stitches or breaking stitches, happy days! I even used a double needle for the hem with no dramas!
I had this lovely red organic cotton jersey in my stash which was just asking to be a Christmas dress! I found this free pattern online by So Sew Easy, which promised to be simple, and it was!
I didn't make a muslin, so the fit is not perfect. I would have liked the shoulders to be slightly wider, but other than that I am happy with it. I didn't have to add length to the bodice, which is unusual for me. If you're not tall or don't have a long body you may need to shorten it. I did add length to the skirt (standard!).
To dress it up a little I added some vintage sequin trim from Nona's stash. It's actually a dark brown, but looks black from a distance.
Friends on Instagram had been telling me how easy sewing with knits was, and they were right. I just needed a machine that could handle them!
 |
| Photos c/o my wonderful Husband |
Monday, 10 August 2015
I Made It Monday: Adding Lace Detail
I'm a girly girl who loves lace, floral and all things pretty!
I had been seeing tops with different lace details in the shops and thought "I can do that!".
I took an old knit top and decided to add the lace to the front; I simply sewed it over the existing shirt!
Here's how I did it:
1. Take an existing top and make sure it is laid flat. (I don't suggest using a tight fitting top unless your lace has the same amount of stretch as your top.)
2. Pin a piece of lace to the top following the side, bottom, neck & should seams. Cut lace close to the line of pins.
3. Sew lace along line of pins; ensuring you don't sew the back of the top to the front!
4. Trim any excess lace to give a neat finish.

Ta da! From boring to fabulous!
I liked the look of the raw edge of the lace, however if you want a more polished look I suggest making a narrow hem around your lace before attaching to your top.

You could (and I probably will!) make variations by adding lace only to the shoulders, or giving your top a lace yoke, or sleeves, or back. The possibilities are endless!
I had been seeing tops with different lace details in the shops and thought "I can do that!".
I took an old knit top and decided to add the lace to the front; I simply sewed it over the existing shirt!
Here's how I did it:
1. Take an existing top and make sure it is laid flat. (I don't suggest using a tight fitting top unless your lace has the same amount of stretch as your top.)
2. Pin a piece of lace to the top following the side, bottom, neck & should seams. Cut lace close to the line of pins.
3. Sew lace along line of pins; ensuring you don't sew the back of the top to the front!
4. Trim any excess lace to give a neat finish.

 |
| Apologies for the bad mirror selfie; life & bad weather got in the way of proper photos! |
Ta da! From boring to fabulous!
I liked the look of the raw edge of the lace, however if you want a more polished look I suggest making a narrow hem around your lace before attaching to your top.

You could (and I probably will!) make variations by adding lace only to the shoulders, or giving your top a lace yoke, or sleeves, or back. The possibilities are endless!
Monday, 3 August 2015
I Made It Monday - 50's Inspired Pants, self drafted
This week I made pants!
I have made a number of skirts, dresses and tops from self drafted patterns (for my non-sewist readers: self drafted means you make the pattern, it's not a purchased commercial pattern) however I have never attempted fitted pants. I thought pants would be too tricky.
A lovely lady from my knitting group gifted me her 20+ year old Sure Fit Designs kits (they are still available, and I'd recommend them!) so I thought I'd give pants a go.

I love the 50's style high waisted cigarette style pants (sort of a jegging with a back zip!). However, being tall it's hard to find them with a long enough rise (crotch length) - the tall girls know what I'm talking about!!
I used an inexpensive stretch denim to make a wearable muslin (sewing code for: wearable but okay to make many alterations on & junk if it all goes horribly wrong!). After 4 fittings and rounds of alterations I was happy with the end result.
I was unsure about the high waist but they are so comfortable! No muffin top to be found!
What have you made with a self drafted pattern?
I have made a number of skirts, dresses and tops from self drafted patterns (for my non-sewist readers: self drafted means you make the pattern, it's not a purchased commercial pattern) however I have never attempted fitted pants. I thought pants would be too tricky.
A lovely lady from my knitting group gifted me her 20+ year old Sure Fit Designs kits (they are still available, and I'd recommend them!) so I thought I'd give pants a go.
I love the 50's style high waisted cigarette style pants (sort of a jegging with a back zip!). However, being tall it's hard to find them with a long enough rise (crotch length) - the tall girls know what I'm talking about!!
I used an inexpensive stretch denim to make a wearable muslin (sewing code for: wearable but okay to make many alterations on & junk if it all goes horribly wrong!). After 4 fittings and rounds of alterations I was happy with the end result.
I was unsure about the high waist but they are so comfortable! No muffin top to be found!
 |
| Wool top: Country Road (old) / Pants: Made By Me / Shoes: Old |
 |
| Photos c/o my wonderful Husband |
What have you made with a self drafted pattern?
Monday, 27 July 2015
I Made It Monday - Dress to Skirt Refashion
This is a really easy refashion! Perfect if you're learning to sew because it's just that easy!
I took a too short halter neck dress that was given to me and turned it into skirt.
I could have worn the dress as a tunic top, but I don't wear halter tops. I did love the fabric with it's gorgeous olive green colour and cool print.*
I simply used wide elastic as the waist band - I liked the contract of the black with the fabric.
Here is how I did it:
1. Determine how long you want your skirt to be; measure that length from the bottom up. This way you can use the original hem - easy!
2. Cut. I cut the dress to give myself a below knee length skirt and to make the most of the fabric print. Finish the raw edge.

3. Take 5cm wide elastic which is the same as your waist measurement (don't make it too tight as that can give even the skinniest girl muffin top!). Sew the edges together to form a circle.

4. Matching right sides of skirt and elastic together pin at 12 o'clock, 3 o'clock, 6 o'clock and 9 o'clock. The elastic will be smaller than the skirt.
5. Using a zig zag stitch sew the elastic to skirt, stretching as you go so the elastic lays flat on the skirt.

Ta da! You're done! You have a fabulous new skirt and you only had to sew one seam!

*Caution: cutting up dresses to make skirts can be addictive... I've already converted 3 rarely worn dresses into skirts that are destined to be favourites!
Monday, 20 July 2015
I Made It Monday - Wide Leg to Joggers Refashion
Whenever I'm not 100% sold on a trend I'll make / refashion it myself first before spending any money on something I may fall quickly out of love with.
If you follow me on IG you will have noticed that my style is fairly classic. I do occasionally like to try new trends, but I always go back to the classics.
The joggers trend for example. I like the look on other people, but wasn't sure about it for me. Plus if I wanted a pair which was long enough I'd have to buy them online and I wanted to try them on first. Oh the drama!
So I took a pair of wide leg pants that I wasn't that fussed on and refashioned them.
Here's how I did it:
1. Try pants on inside out & pin inside seam to desired width. I started just above my knee and worked my way down.
*Important tip* - make sure you leave the ankle opening wide enough to get your foot out! I may or may not have (totally did) pinned myself into my pants then couldn't get them off.
2. Sew along line of pins & try them on again to ensure you're happy before cutting off the excess fabric. Finish seams.
3. I added cuffs to the bottom of my pants rather than just making a casing to tread elastic at the bottom. This gave me some extra length. The cuffs I used were knit fabric.
Ta da! An easy refashion from old wide leg pants to joggers.

I've already worn these pants more in their new life as joggers than I ever did when they were wide legged.
Have you embraced the joggers trend?
If you follow me on IG you will have noticed that my style is fairly classic. I do occasionally like to try new trends, but I always go back to the classics.
The joggers trend for example. I like the look on other people, but wasn't sure about it for me. Plus if I wanted a pair which was long enough I'd have to buy them online and I wanted to try them on first. Oh the drama!
So I took a pair of wide leg pants that I wasn't that fussed on and refashioned them.
 |
| Top: Long Tall Sally / Necklace: Made By Me Pants: Made By Me / Shoes: Target |
Here's how I did it:
1. Try pants on inside out & pin inside seam to desired width. I started just above my knee and worked my way down.
*Important tip* - make sure you leave the ankle opening wide enough to get your foot out! I may or may not have (totally did) pinned myself into my pants then couldn't get them off.
2. Sew along line of pins & try them on again to ensure you're happy before cutting off the excess fabric. Finish seams.
3. I added cuffs to the bottom of my pants rather than just making a casing to tread elastic at the bottom. This gave me some extra length. The cuffs I used were knit fabric.
Ta da! An easy refashion from old wide leg pants to joggers.

 |
| Photos c/o of wonderful Husband |
I've already worn these pants more in their new life as joggers than I ever did when they were wide legged.
Have you embraced the joggers trend?
Monday, 13 July 2015
I Made It Monday - Pencil Skirt with Leopard Accent
On todays "I Made It Monday" I'm wearing a basic black pencil skirt that I made with a little leopard flare.
I love leopard print but in my wardrobe I only have it in shoes, scarves, belts & bags. I love leopard on other people in the form of skirts, dresses and jackets but just don't think it works for me.
So I've found a way to add a little more leopard print to my wardrobe. For me this is a happy medium; it's still my basic black staple but it's a bit more fun and interesting with the addition of the leopard print. Maybe this is me taking baby steps towards an actual piece of leopard print clothing!
This is an easy technique you can use to add some colour or pattern accents into your wardrobe if you're like me &too chicken conservative not ready to go all in!
Here's how to do it:
 1. Take a pencil skirt pattern or existing pencil skirt like I did & trace to get front and back pieces. (Take into consideration the amount of stretch your fabric has). Add allowances for seams, waistband casing and hem.
2. Deciding how wide you want your accent strip to be (e.g. 10cm) deduct 5 cm from each side on both front & back pieces.
3. With right sides together sew the accent strip to front & back pieces.
4. Make a casing for your waistband elastic. Thread elastic & close casing.
5. Hem your skirt to desired length.
Ta da! You have a fabulous new skirt!

 |
| Top: Long Tall Sally / Skirt: Made By Me / Shoes: Diana Ferrari |
I love leopard print but in my wardrobe I only have it in shoes, scarves, belts & bags. I love leopard on other people in the form of skirts, dresses and jackets but just don't think it works for me.
So I've found a way to add a little more leopard print to my wardrobe. For me this is a happy medium; it's still my basic black staple but it's a bit more fun and interesting with the addition of the leopard print. Maybe this is me taking baby steps towards an actual piece of leopard print clothing!
This is an easy technique you can use to add some colour or pattern accents into your wardrobe if you're like me &
Here's how to do it:

2. Deciding how wide you want your accent strip to be (e.g. 10cm) deduct 5 cm from each side on both front & back pieces.
3. With right sides together sew the accent strip to front & back pieces.
4. Make a casing for your waistband elastic. Thread elastic & close casing.
5. Hem your skirt to desired length.
Ta da! You have a fabulous new skirt!

 |
| Photos c/o my wonderful Husband Who loves an action shot! |
Friday, 10 July 2015
Adding Length to a Top
The colour black is my one true clothing love and I wear it most often but I just can't resist green. Emerald, Kelly, whatever you call it - I love it!
When I was in the USA a few years back and saw a fabulous green hoodie on clearance at Old Navy for less than $10 I had to have it. Sure it was a little short, but I told myself the lie that every tall girl tells herself... it's not that short (unless I move!) & I can stretch the sleeves. Then it shrank in the wash. Whoops.
So rather than give it to a short friend I decided to make it work by doing some colour blocking with navy Ponte fabric I had left over from making this midi skirt.
It's a simple fix!
Cut off the wrist bands and bottom band - carefully as it will fray!
Sew in fabric which is the same width as the original piece and your desired length. If the top you are adding to is a stretch fabric, then add in stretch fabric. If it's a woven fabric, then use woven fabric.
Use a zig zag stitch if your top is stretchy and finish the edges.


A little tip: make sure your wrist bands are the right way around when you reattach them. One of mine is backwards which bothers me, but not enough to fix it!
Ta da! Now I have a colour block hoodie which actually fits.
I don't know about the other tall girls out there but I feel much more comfortable when my sleeves are actually long enough!
When I was in the USA a few years back and saw a fabulous green hoodie on clearance at Old Navy for less than $10 I had to have it. Sure it was a little short, but I told myself the lie that every tall girl tells herself... it's not that short (unless I move!) & I can stretch the sleeves. Then it shrank in the wash. Whoops.
So rather than give it to a short friend I decided to make it work by doing some colour blocking with navy Ponte fabric I had left over from making this midi skirt.
It's a simple fix!
Cut off the wrist bands and bottom band - carefully as it will fray!
Sew in fabric which is the same width as the original piece and your desired length. If the top you are adding to is a stretch fabric, then add in stretch fabric. If it's a woven fabric, then use woven fabric.
Use a zig zag stitch if your top is stretchy and finish the edges.


A little tip: make sure your wrist bands are the right way around when you reattach them. One of mine is backwards which bothers me, but not enough to fix it!
 |
| Jean: Refashioned by Me / Booties: Target Photos c/o of wonderful Husband |
Ta da! Now I have a colour block hoodie which actually fits.
I don't know about the other tall girls out there but I feel much more comfortable when my sleeves are actually long enough!
Monday, 6 July 2015
I Made It Monday - Another Midi & Great Fabric Find!
Welcome back to "I Made It Monday"!

I really should have named this blog "The Tall Mama & Her Midi" because I love them & hope you do too!
This midi skirt is made from my basic midi pattern with 2 box pleats in the front and back (see tutorial here).
I often get asked where I find my fabrics. I buy most of my fabric from The Remnant Warehouse; I'm in no way affiliated with them (but would love to be - I'd make you proud The Remnant Warehouse!!). I love their selection, quality and most importantly price! Check them out online.
I am also lucky enough to be gifted fabric from people who know I sew and have a love & appreciation of vintage fabric (examples here and here).
However you don't have to limit yourself to fabric stores when looking for fabric, inspiration can strike anywhere! This gorgeous yellow & grey geometric fabric started its life as a doona (duvet) cover at Target! Yep, I saw this in the bedding section and thought "why can't I find fabric like that for a midi skirt?". Duh! It is fabric and I can turn it into a skirt with plenty to spare!
So the moral of the story is: when shopping for fabric don't limit yourself to fabric stores or feel discouraged if you don't have good fabric stores in your area. Keep an open mind and great fabrics can be found anywhere!

 |
| I made a centre back zip in this skirt with 2 box pleats. |
 |
| I do wish I'd take the time to match the triangles on the side seam, but I was rushing to finish the skirt to wear to a baby shower. Photos c/o my wonderful Husband |
I really should have named this blog "The Tall Mama & Her Midi" because I love them & hope you do too!
This midi skirt is made from my basic midi pattern with 2 box pleats in the front and back (see tutorial here).
I often get asked where I find my fabrics. I buy most of my fabric from The Remnant Warehouse; I'm in no way affiliated with them (but would love to be - I'd make you proud The Remnant Warehouse!!). I love their selection, quality and most importantly price! Check them out online.
I am also lucky enough to be gifted fabric from people who know I sew and have a love & appreciation of vintage fabric (examples here and here).
However you don't have to limit yourself to fabric stores when looking for fabric, inspiration can strike anywhere! This gorgeous yellow & grey geometric fabric started its life as a doona (duvet) cover at Target! Yep, I saw this in the bedding section and thought "why can't I find fabric like that for a midi skirt?". Duh! It is fabric and I can turn it into a skirt with plenty to spare!
So the moral of the story is: when shopping for fabric don't limit yourself to fabric stores or feel discouraged if you don't have good fabric stores in your area. Keep an open mind and great fabrics can be found anywhere!
Saturday, 4 July 2015
Fabulous Separates
In my post on Monday (check it out here if you missed it) I talked about how I sometimes make a top and skirt out of the same fabric to maximize my wardrobe. When I wear them together they look like a dress, but I have the benefit of wearing them as separates.
This genuine 1970's polyester fabric which was lovingly gifted to me was so fabulous I wanted to make the most of it! I usually dislike synthetic fabric, but who can pass up genuine 1970's polyester?! Fabulous!
Here is the matching top and skirt:


Here is the top with a denim pencil skirt (also made by me):
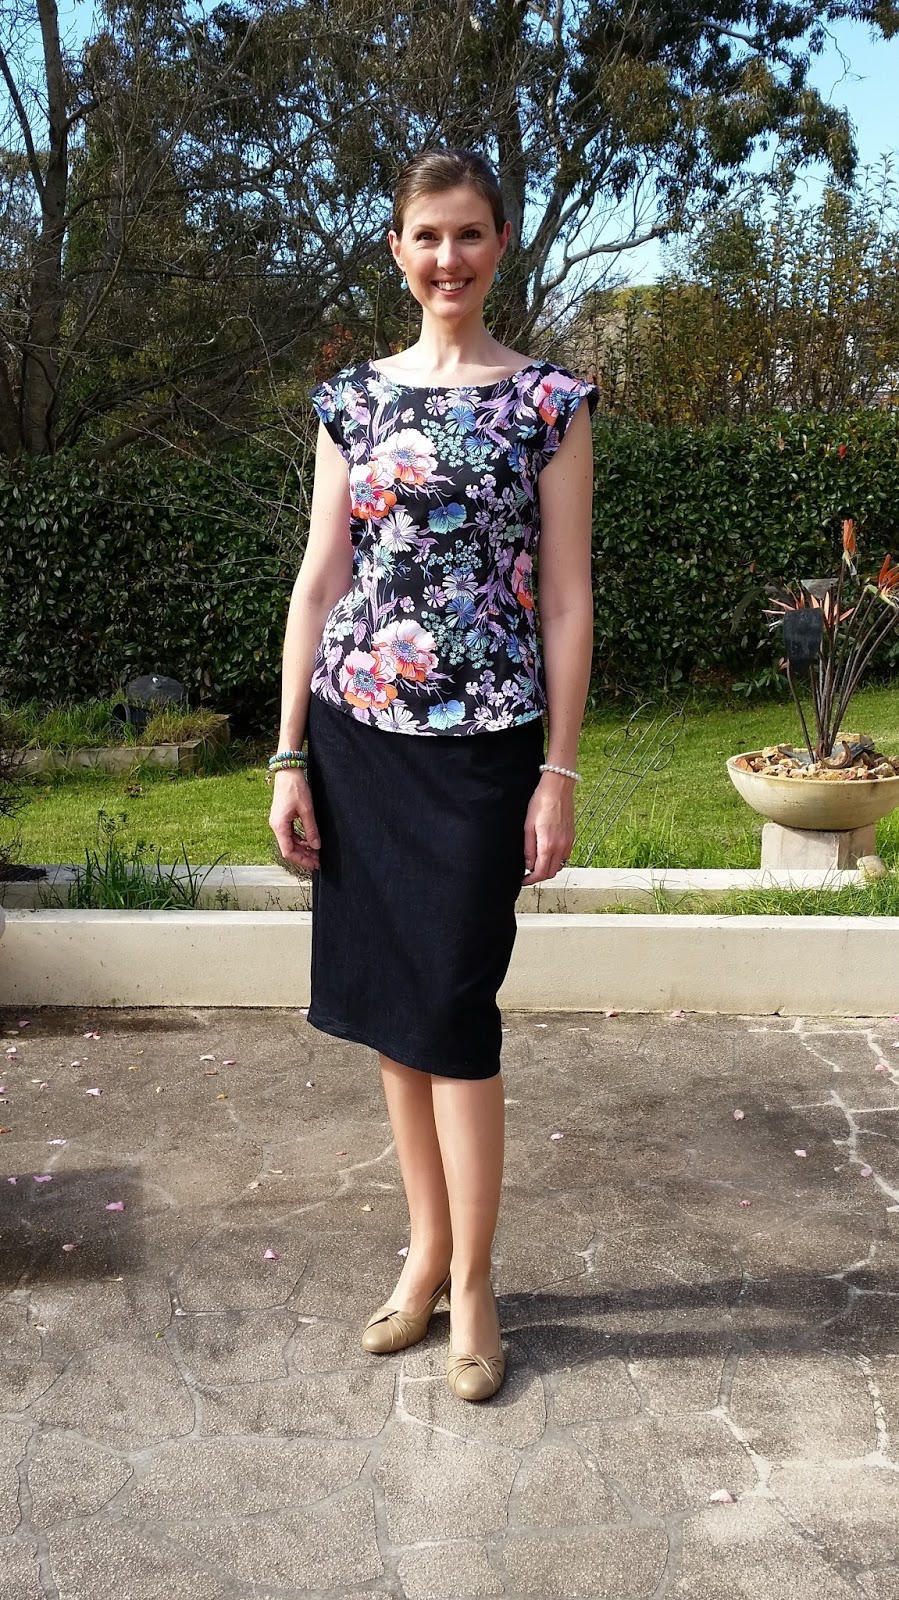 |
| The top is New Look Pattern 6194 with the neckband omitted & length added (but that's just a given for me, right?!). |
 |
| Photos c/o of my wonderful Husband |
Wednesday, 1 July 2015
Letting Down A Hem Tutorial
Do you have a skirt (or pants) that you feel is just a little too short?
Here is a simple way to let down the hem for extra length. As a tall girl I need to do this a lot!
I've used a skirt here for my example. You will notice that I've used a bright blue fabric, of course the sensible thing to do would be to use a coordinating fabric but I like the secret pop of colour inside my skirt!

1. Unpick the hem to see how much extra fabric you have to work with. Press the hem flat using the highest iron setting the fabric will tolerate. I place a slightly damp cloth over the hem when pressing.
2. Take a scrap of fabric the same width as your skirt (or pant leg) and at least 5 cm high to give a nice finish.
3. With right sides together machine sew the fabric to the bottom edge of your skirt.
4. Fold under 0.5cm and sew along the raw edge of your added fabric.

5. Press the seam up towards the bottom of the skirt so your added fabric sits on the inside and not at the very edge of the skirt.
6. Invisible hem (I prefer to do this by hand) and you're done.


Ta da! A little extra length that goes a long way!
Monday, 29 June 2015
I Made It Monday - Simple Skirt Tutorial - Perfect for Beginners!
 |
| Top: New Look Pattern 6194, neckband omitted & made longer / Fabric: Gifted, purchased in 1970's. 100% genuine 70's Polyester! |
 |
| I often make a skirt & top in the same fabric so I have the versatility of wearing it as a dress or separates. |
 |
| Photos c/o my wonderful Husband |
This skirt is really easy to make and perfect for beginners as it is hard to mess up! It is basically a rectangle with elastic in one end. I suggest you use a soft fabric so it has nice drape. Here I've used a fabulous 1970's polyester which was given to me. I love it!
Here is how to make it:
1. Measure your waist, and multiply that number by 1.5. This will be your skirt width measurement. Measure from your waist to your knee; this is your length measurement.
Cut two rectangles of fabric using these measurements. Then cut two waistband rectangles using the same width measurement, and making it 10cm in height.
2. Sew the sides of the skirt up with right sides together, then sew the sides of the waistband up with right sides together. Finish seams on skirt (you don't have to finish waistband seams).
3. Fold the waistband in half (5 cm tall) and has a folded edge on one side and two raw edges on the other side.
4. Pin the waistband around the top of the skirt. Make sure the raw edges of skirt & waistband are together. Sew around the entire waistband with a straight stitch and a 1.5cm seam allowance, but leave 5cm open so you have a spot to slide your elastic inside.
5. Measure your waist where you want your skirt to sit and cut a piece of elastic to this size. Attach a pin to one end and use it to feed the elastic through the waistband casing you just created. To ensure the other end of the elastic doesn't slide into your casing -- secure it with a safety pin at the opening. Once the elastic is completely fed through, sew the ends of the elastic together really well.
6. Sew the opening in the waistband closed. Finish your seams with an overlocker (serger) or zig zag stitch.
7. Hem your skirt to your desired length. You can hand sew or machine sew the hem.
8. Press your seams, hem and skirt well, it helps the stitches set and gives a professional finish. Do not skip this step!

Ta da! You have made a skirt! Put in on and feel fabulous and proud every time you get a compliment on it!
Friday, 26 June 2015
Mabel Midi Skirt


 |
| Shirt: Lee Cooper / Skirt: Made By Me / Shoes: Target |
 |
| I just love the detail of this vintage floral fabric! Photos c/o my wonderful Husband |
I cannot get enough of my "Mabel Midi" I've worn it 3 times this week!
If you missed last Monday's post on how this skirt came to be - check it out here.
Today I've styled it with some casual flats and my favourite Chambray shirt (more about the shirt here). I think the belt ties the outfit together well while keeping it casual.
I am so in love with this skirt! I'm sure I'll be sharing many more "Mabel Midi" looks!
Do you have an item of clothing you love to style in different ways?
Monday, 22 June 2015
I Made It Monday - Faux Fur Vest
Wow, this Monday has come around fast!!
 |
| Vest: Made By Me / Jeans: Refashioned by Me; Gap / Top: Long Tall Sally Earrings: Made By Me |
 |
| Booties: BCBG (old) / Jeans: Refashioned by Me / Top: Country Road Vest: Made By Me / Earrings: Made By Me / Sunglasses: Kenneth Cole |
 |
| Photos c/o my wonderful Husband Who secretly thinks the vest makes me look like a caveman but is too nice to say so. |
I love fur vests on other people, I just wasn't sure about the look on me. So rather than investing a lot of money in something I wasn't sure about, I decided to make one.
Let me start of by saying the fact that this stuff is called "fun fur" suggests the manufacturer had a wicked sense of humour. It was not fun to sew with. It was messy and fluffy and stiff and messy... oh and did I mention the mess?!
To make a pattern I simply traced around an existing vest. I added pockets to my vest, because I love pockets in everything! It is fully lined and after scouring the internet I came across this really helpful tutorial for construction.
I am happy with the end result. I like wearing it with a belt to give some waist definition and it keeps me warmer than wearing it open.
Despite the massive amount of mess - this stuff flies everywhere while cutting & sewing! - it was a quick and fairly simple project which only cost me $23 as I already had the lining.
Have you sewn with faux fur?
Thursday, 18 June 2015
Black & Blue


 |
| Boots: Sergio Rossi (old) / Skirt: Made By Me / Top: Country Road Scarf: Sportsgirl / Sunglasses: Kenneth Cole (old) |
 |
| Photos c/o my wonderful Husband |
I've styled my navy midi (made by me) for winter with a black wool turtleneck and black boots.
I think it was way back in high school when someone told me you shouldn't wear black and blue together because you look like a bruise. That has always stuck in my mind but never stopped me from wearing it! I most often wear a black top with my blue jeans!
What do you think? Does black & blue make you look like a bruise?!!
Monday, 15 June 2015
I Made It Monday - "Mabel Midi"
Welcome back to "I Made It Monday!"
Today I'm wearing something which was half made by me, half made by my Great Grandmother 50 - 60 years ago!
I was recently given sewing patterns and fabric which had belonged to my Great Grandmother Mabel. The oldest of the patterns is for a Nightgown from 1923! She would have brought this pattern with her when she migrated from Scotland to Australia.
Great Grandma Mabel made everything herself using her peddle powered sewing machine; all of her clothes and even underwear!
Amongst the fabric remnants was a skirt, with only the side seams sewn. I was told that she always wore dresses, so this would have been the bottom of the dress but sadly the top was nowhere to be found. As Mabel was a "sturdy" woman there was enough fabric to make a pleated midi skirt and cut some off the bottom to make into a waist band.
It is so special to me to work on a piece started by my Great Grandmother. To think she had lovingly selected this fabric, washed and ironed it, then started to turn it into a garment long before I was born is remarkable.

I used lots of hand sewing to be in keeping with how Mabel would have sewn. I did use my overlocker on one seam, telling myself that if Mabel had an overlocker she would have used it, but then I felt guilty as I wasn't preserving the vintage integrity of the piece so I finished the other side seam using just the sewing machine. Talk about over thinking a seam!
I used a similar method to this to construct the skirt, but just made 2 box pleats in both the front and back.
Needless to say this skirt has become an instant favourite which I've dubbed the "Mabel Midi"! So brace yourselves, you'll be seeing a lot of it!
I can't wait to style it for summer!
Today I'm wearing something which was half made by me, half made by my Great Grandmother 50 - 60 years ago!
 |
Great Grandma Mabel made everything herself using her peddle powered sewing machine; all of her clothes and even underwear!
Amongst the fabric remnants was a skirt, with only the side seams sewn. I was told that she always wore dresses, so this would have been the bottom of the dress but sadly the top was nowhere to be found. As Mabel was a "sturdy" woman there was enough fabric to make a pleated midi skirt and cut some off the bottom to make into a waist band.
It is so special to me to work on a piece started by my Great Grandmother. To think she had lovingly selected this fabric, washed and ironed it, then started to turn it into a garment long before I was born is remarkable.
 |
Skirt: Vintage collaboration between myself & Great Grandma Mabel / Top: Saba (old) Shoes: Jane Debster / Purse: Thrifted / Necklace: Refashioned Thrifted |

I used lots of hand sewing to be in keeping with how Mabel would have sewn. I did use my overlocker on one seam, telling myself that if Mabel had an overlocker she would have used it, but then I felt guilty as I wasn't preserving the vintage integrity of the piece so I finished the other side seam using just the sewing machine. Talk about over thinking a seam!
I used a similar method to this to construct the skirt, but just made 2 box pleats in both the front and back.
 |
| As it was a cold day I needed my fav jacket Jacket: Laura Ashley (old) / Scarf: Seed (old) No, I'm not striking a fancy pose... I'm falling off my own feet! Photos c/o my wonderful Husband who catches me at my most awkward moments! |
Needless to say this skirt has become an instant favourite which I've dubbed the "Mabel Midi"! So brace yourselves, you'll be seeing a lot of it!
I can't wait to style it for summer!
Subscribe to:
Posts (Atom)