Home

Showing posts with label sewist. Show all posts

Friday, 1 March 2019

Hippo Hobo Backpack Hack

Hello!

When I recently found myself needing to use crutches, I realized that I didn't have a cute backpack.  I've made plenty of handbags, totes, zipper pouches etc but never a backpack!

I couldn't find a pattern that I really loved, so I decided to hack my Hippo Hobo pattern by Emkie Designs  

Here are the changes I made:

  • I added 10cm (4 inches) to the length of the bag (remember to add to exterior fabric and lining!) and omitted the exterior pockets.
  • I added a top handle, attached between the top flap and back panel so I could hang my backpack.  
  • I added straps, also attached between the top flap and back panel.  I made my straps the length of my fabric width and 10cm wide.  I then sewed a fabric tube and inserted a strip of fleece lining to give it some substance before top stitching the straps to hold it in place.
  • I placed my straps 6 inches apart, but that was just personal preference.
I didn't have any adjustable strap sliders on hand (and wanted to finish my backpack ASAP!) so I knotted my straps to the D-rings, that way they are still adjustable for when one of my daughters want to borrow my backpack.  I would recommend using the adjustable strap sliders!

For my fabrics, I used quilting cotton (which I interfaced) for the main body and rigid denim for the base and accents.  I loved the selvedge edge of the denim, so I used it as a feature on the top handle and the closures.  For the lining of my bag I used a polka dot cotton.  You can see a peak of the lining on the sides this bag, so I cut 5 cm off the top of my lining pieces and added a 5.5 cm piece of the main body fabric.


My rose gold swivel clip is available from WhoSaysSew.com Pretty hardware makes such a difference to your makes!


Happy Sewing!
xox Allison

Tuesday, 9 October 2018

Fall In Love Cardigan / fabric Tetris mastery!


Hello!

You know when you have the perfect vision for a make?  Pattern and fabric which are a match made in heaven...and nothing is going to stand in your way!

That was me with this knit fabric from Hawthorne Supply Co.  The fabric was actually leftovers from a make I was commissioned to sew for someone else, but I knew it would make a divine Fall In Love Cardigan (pattern by Sew To Grow

To make it happen I tapped in to all those wasted years playing Tetris!  Naturally, I had to consider grain and stretch but by being willing to add extra seams and forsake pattern matching it was possible.  For example, the neck band of this pattern is 2 pieces which join in a seam at the back of the neck.  However my version has a 3 piece band and it was very lucky that my neck band seams matched the shoulder seams, making it look intentional.

I really had to get creative on the sleeves.  I didn't have enough fabric for long sleeves, so was happy to go with the 3/4 sleeve option on the pattern.  To achieve the 3/4 sleeves I had to add large cuffs to my sleeves, which is something I like to do anyway.  I think longer sleeves on knit garments look much nicer with a cuff than just a hem.  However, I didn't have enough fabric to cut 2 sleeves the same length so 1 of my sleeves has an extra seam at the elbow.  Fortunately the pretty floral design disguises it well and there is even some unintentional pattern matching going on!

The original pattern has a waist tie...I didn't have any fabric left to make one, but am happy with it just as it is!

The Fall In Love Cardigan (by Sew To Grow) is a pattern I have made twice before and absolutely love.  It is a fast and easy make and is effortless styling for all seasons.   

Moral of the story is: when you really love a fabric, you can make marvelous things happen!  This cardi is perfect for layering and for warmer months.  Remember, the fabric requirements on a pattern are just a guide!

For reference: I made size xs and added 12cm in length.

Happy Sewing!

xox Allison  

Thursday, 12 July 2018

Handmade Fabrics; Supporting traditional textile making

This fabric was gifted to me by The Delhi Store.  My love for this fabric is real, and not sponsored!

As a maker, I value handmade.

So many fabrics are mass produced that I feel like I'm falling into the "fast fashion" trap when I buy them, although I am making my garments I still wonder "who made my fabric"?

When I was contacted by The Delhi Store (soon to be launched as Fabrics & Notions website) I was thrilled!

Their fabrics are sourced directly from the Artisans across India and are all handmade.  There is something so special about sewing with handmade fabric!  To know I'm creating with my hands, with something from the hands of another maker gives me all the good feels!

Here is some info from the owner of The Delhi Store:

Eclectic collection of handloom fabrics, hand block printed fabrics and vintage sarees.

I've been fascinated with textiles for as long as I can remember. As a little girl, I was in awe of my granny's and mother's beautiful saris. I remember, that once my grandma gave me an old blue silk georgette saree to play with, that had beautiful metallic dots all over, and I used it as a canopy over a small tree, and imagined it was a beautiful night sky full of bright, little stars.

After completing college and working in IT education for a while I left my job as I wasn't enjoying it much. I have always been the creative type and an admirer of handicrafts of all sorts.
I am especially drawn to the centuries old art of making hand printed, handwoven, hand embroidered textiles.


Within India, there are so many types of weaving, printing and embroidery techniques that are practiced. Sadly, these techniques are dying a slow death, as the artisans don't get what they deserve for their hard work.This is my small endeavour to save these intriguing techniques from vanishing completely.

You might get such fabrics much cheaper elsewhere but think before you buy; are you contributing to sweatshop practices?


Isn't that inspiring?!!


 With the beautiful cotton chambray I was gifted I made a self drafted elastic waisted midi skirt (with pockets I copied from an 80's McCalls pattern and use whenever I can!!).  The top I made is the top from the Kate Tea Dress by Designer Stitch.  This dress pattern also gives you the options of making separates, which I think is awesome!  I added 5cm to the top length for my height. 


The fabric is beautiful quality; much better quality than the price would suggest!  Handmade fabric always has slight irregularities, however it's part of its charm.  This fabric is lightweight, but not sheer, with great drape.  It will be perfect for summer!


I used some decorative stitches around the neckline of my top (you can read more about that soon on the Husqvarna Viking Australia blog).  I'm still having so much fun with my Designer Jade 35 machine!  I love that it feels like a machine I won't "outgrow" as I'm always discovering new stitches!


If you follow me on IG you'll know that I've just come back from Bali.  I was SO inspired by and impressed with the skills of the Balinese textile Artisans.  I was lucky enough to see cotton being dyed and to watch hand weaving which was truly hypnotic!  

Beautifully woven plains, breathtaking Ikat's and dreamy batik fabrics are all made on the island of Bali.  Sadly, the traditional textile industry is diminishing due to industrialization.  Machine made fabrics are faster, cheaper and can be made in larger quantities.  Young people are not learning the textile arts from their elders because they can't make a living from it. I was really touched by that fact, and it has been on my heart to do what I can to help support these beautiful people and their amazing skills and traditions.  

I'm proud to be a maker, supporting other makers!

Monday, 28 May 2018

Matilda Shirt Dress by Megan Neilsen

Hello!

It was love at first sight with the Matilda Shirt Dress by Megan Neilsen.  I bought it right away, glued together & cut out the pdf (yes, I prefer glue to tape. It's a controversial divide in the pdf pattern community!!!) and then it sat in my sewing room.  I even had the perfect fabric for it in my stash!

At the time I was using a vintage machine, which meant manual buttonholes.  Try as I might, my buttonholes were always different sizes which made me crazy!!  You can read more about my experience with my new Designer Jade 35 machine over on the Husqvarna Viking Australia blog.

To make this pattern fit me, I added 2.5cm to the bodice length (may do slightly less next time) and 10cm to the skirt length.  I graded between XS & S sizes too.

The dress has a lot of pieces, but the instructions are really clear and easy to follow (I actually followed them!).  I love the fit of the dress which makes me want to try more of Megan Neilsen's patterns!  I like that the waistband and yoke are lined and don't get me started on those great skirt pockets...love!!!

The shape of the skirt is really great too, swishy without being too much of a fabric hog!  I find that the buttons can pull when you sit in straighter shirt dresses, but that doesn't happen with this skirt.  All in all, this is a shirt dress that I'm really happy with!

It is a pattern I'll make again, perhaps I'll try adding sleeves for cooler weather. 


Happy Sewing!
xox Allison

Wednesday, 25 April 2018

Bondi Top with sleeves

I recently lost my sew-jo, so to help get it back I started looking at patterns and then reading blog reviews of those patterns for inspiration.  

Which reminded me that that was why I started blogging in the first place! To contribute to sewing knowledge & inspiration.  I've not been good about that lately, and I'm sorry.  Instagram just makes it SO quick & easy to share makes, but it isn't the detailed resource that a blog post can be. I'm going to try to share more on my blog!

I have more questions on IG about my hacks of The Bondi Top by Sew To Grow than any other pattern (probably because I make it so often!).  It's a very popular pattern because of its inclusive sizing (xs - 4x), simple design lines and it's just a really easy make!  Perfect for a beginner or a fast satisfying make for a more experienced sewist.

I first added 3/4 sleeves to my French Terry version as I didn't want to waste the leftover fabric (I'm thrifty!) & also because it made sense to have sleeves for this thicker fabric. I simply hacked the sleeves by making a rectangle that was the same width as the sleeve opening, then tapering it slightly to the opening.  I added a cuff for a bit of fun!

The great news is that Lindsey, the designer of Sew To Grow patterns has now created a sleeve extension pack you can buy for your Bondi Top.  So you're spared my dodgy hand drawn instructions!!  Also, her version fits perfectly whereas my hack was a bit of trial & error! As hacks tend to be!


I also hacked the stripped top into a tunic length to wear over leggings.  How much length you add is dependent on your height.  Obviously, I (at 183cm) add a lot more length that someone who is 153cm!


My red gingham version was again hacked to have sleeves, but this time I cropped it slightly.  The original pattern has a curved hem that is lower in the back (great butt coverage) but I raised the back hem to match the front.

The Bondi Top is one of those great staples that can be hacked so many ways!  I've made it into a dress, added pockets and made it in knits and wovens.

The extension pack you can buy gives you instructions for adding a casing for a waistband, or you can just add some elastic to the waistline (my dodgy hack).


Next up I'm planning a chambray version with sleeves & waistband casing which I can layer for winter or wear alone in the warmer months.  Hmmm...I may also add some patch pockets because pockets make everything better!!

If you have any questions on my Bondi Top  hacks or hack suggestions of your own, let me know!

Over on the Husqvarna Viking Australia blog you can see my Bondi Top which I added embroidery to.  I love this version & plan on adding embroidery to more!

Happy Sewing!

Thursday, 1 February 2018

Adding a side seam pocket & my first sew with the Designer Jade 35 by Husqvarna Viking

Hello!

I am so excited to be a guest blogger over at Husqvarna Viking Australia!

With all the amazing embroidery and other capabilities of the Designer Jade 35, the first thing I do is an alteration (I guess that's just me!!).  But in my defence, it is my favourite skirt!!  You can read about how I added a nice big (holds your phone!!) side seam pocket over at Husqvarna Viking. 


For my first sewing experience with the Designer Jade 35 I am absolutely thrilled with how it sews and its great built in features.  You can read about the awesome overcast stitch this machine does (because my cranky old overlocker is stubbornly refusing to work...it is NOT a Husqvarna Viking machine!) in my post here.  I can't forget to mention the perfect "fix" stitch it does at the start and end of your seam or the automatic thread cutter! 

I have previously sewn on a vintage machine which had none of these features, so they are all just so amazing to me and make for an even more enjoyable sewing experience!

If you follow me on IG you will know I have been playing with the machine embroidery features a LOT!  My next post will feature my first adventures into machine embroidery.  Those of you who are experienced with machine embroidery will probably roll your eyes and shake your head...but I am just learning and having SO MUCH FUN in the process!

Happy Sewing!
xox Allison


Friday, 26 January 2018

If at first you don't succeed...

As a sewing blogger, or as a sewist in general, we love to show off the makes we are proud of.  The pieces where we have done our best work.
 
But the reality of sewing is that not everything works out. Sometimes it simply does not work out, or you are not happy with it.
 
Do you have an area of sewing that is currently just beyond your reach?
For me it is bag making.
 
I can make a lovely tote bag until the cows come home. However, when I attempt a handbag it just doesn't work out. My first attempt was so bad I didn't even photograph it! The fact that I tried to self draft it based on an existing bag probably had a LOT to do with the fail!
 
My next attempt was better (top right photo below). I used a free pattern by Blue Calla (see here). However, I didn't have any hardware on hand so just didn't use any. This resulted in a really "homemade" looking bag, but not in a good way. I used this bag for a little while, but don't love it.
 
I have just finished another bag (bottom right photo below), also a free pattern by Blue Calla (see here). I used hardware salvaged from a worn out bag. Yes, it is better than the last one but I'm still not thrilled with it. I used suede scraps & leftover fabric from my previous bag making attempt. The pattern is great, it's my execution I'm not happy with.
 
My garment sewing has precision & is as nice on the inside as it is outside. Why is my bag making a hot mess??? Argh! It's frustrating!
 
Currently, I have so little confidence in my skill that I refuse to buy a pattern. Why spend money on something I'm going to mess up?? But this defeatist attitude is not going to get me anywhere!
 
I'm considering trying the Necessary Clutch Wallet by Emmaline Bags.  I've seen so many beautiful versions on insta, I especially love those made in cork fabric. Or the Magnolia Mini Messenger by Blue Calla, also a chance to experiment with cork fabric!
 
I certainly do NOT need another bag or wallet. I just want to conquer this aspect of sewing that seems to ellude me!
 
Of course, I should stop comparing my attempts to the high quality professional leather bags I have. Lets be honest, I have neither the skill or equipment to come close to my Carbotti or Coach handbags!
 
Big sigh...I will just keep ploding along and hope for something functional that isn't a hot mess!
 
Is there an area of sewing that you want to improve in? Or perhaps you want to start sewing, but think you will mess it up (contact me, I can recommend fool proof patterns for beginners!)
 
Happy Sewing! Wish me luck!!

Xox Allison
On the left is how I want my bags to look, on the right are what I have so far.
Granted, I have neither the tools or skill to make a Chanel bag...

Thursday, 18 January 2018

White Pants Confession #smyly2018

Currently on Instagram there is a tag gaining momentum amongst the sewing community: #smyly2018
 
Sewing makes you love yourself.
 
For me, this is SO true.
 
As a teen, growing up in Australia, there were no tall retailers and it was before online shopping.
 
I truly believed there was something wrong with me, with my body, because the clothes I wanted to wear and buy did not fit me properly. They did not fit at all.
 
I was a very chubby teen, which didn't help, but being 6 feet tall meant everything was too short.
 
It wasn't until I started sewing that I realized that the problem was with the clothes, not with me. But even then, I felt somehow wrong or different because I had to make so many changes to patterns.
 
I have a rare congenital bone defect in my lower left leg (congenital pseudarthrosis, which caused a non union in my fibula and bow & fracture in the tibia). So my left leg is 2.5 cm (1 inch) shorter than my right leg. My hips are uneven, which makes fitting pants really difficult. I would do my best to hide this "flaw" in the way I dress and stand. I even avoided wearing a belt because it drew focus to how uneven my hips were (which was ridiculous, sometimes you need a belt to hold your pants up!).
 
I would never wear light colours on my lower half because I thought it drew attention to my uneven hips and was not flattering to my pear shape.
 
Fast forward to a few years ago and I came across the blog Pretty Tall Style by the fabulous Tanasha. She made beautiful clothes and she was tall. Tanasha talked about the modifications she made to patterns to fit her tall frame in a straight forward and matter of fact way, because that's what you do to make a pattern fit you.
 
It was like a light went on for me! Of course it was normal to make adjustments. Why did I see that so clearly for someone else, but for myself I still felt a bit "not normal" about it.
 
Then I got on Instagram and the seeing all the adjustments and fitting issues of marvellous women of all shapes and sizes was like a shining light and Hallelujah chorus from heaven. EVERYONE has fit issues! Everyone!
 
I already had a good sense of style that suited me and worked for my body. Sewing made me focus further on fit and really changed my thinking from "my body isn't right for that skirt/trouser/dress" to "that clothing item isn't right for my body".
 
It was a small but powerful shift.
 
The problem was not me. The clothes were not right for me.
 
This shift in thinking encouraged me to challenge my thoughts about what I could & could not wear. I always loved the look of white pants on others, women of all shapes and sizes. So why did I think I couldn't wear them?
 
I decided to make myself a pair. To be honest, the pattern I used did not suit my body so I had 3 attempts at getting them right (with long frustrated breaks in between!) but I finally got there.
 
They are not perfect. With my uneven hips & leg length discrepancy getting a perfect fit is beyond my capabilities currently, but the pants are comfortable and wearable. One of my sewing goals for 2018 is to create a pants block for my body, which means drafting each side sperately to accommodate my wonky shape.
 
Sewing has helped me accept my body for what it is. Honestly, I'm lucky just to have my leg as most people with my condition have had the limb amputated in childhood. When I remind myself of that, a few pull lines on a pair of pants really aren't a big deal!
 
Happy Sewing!
Xox Allison
 
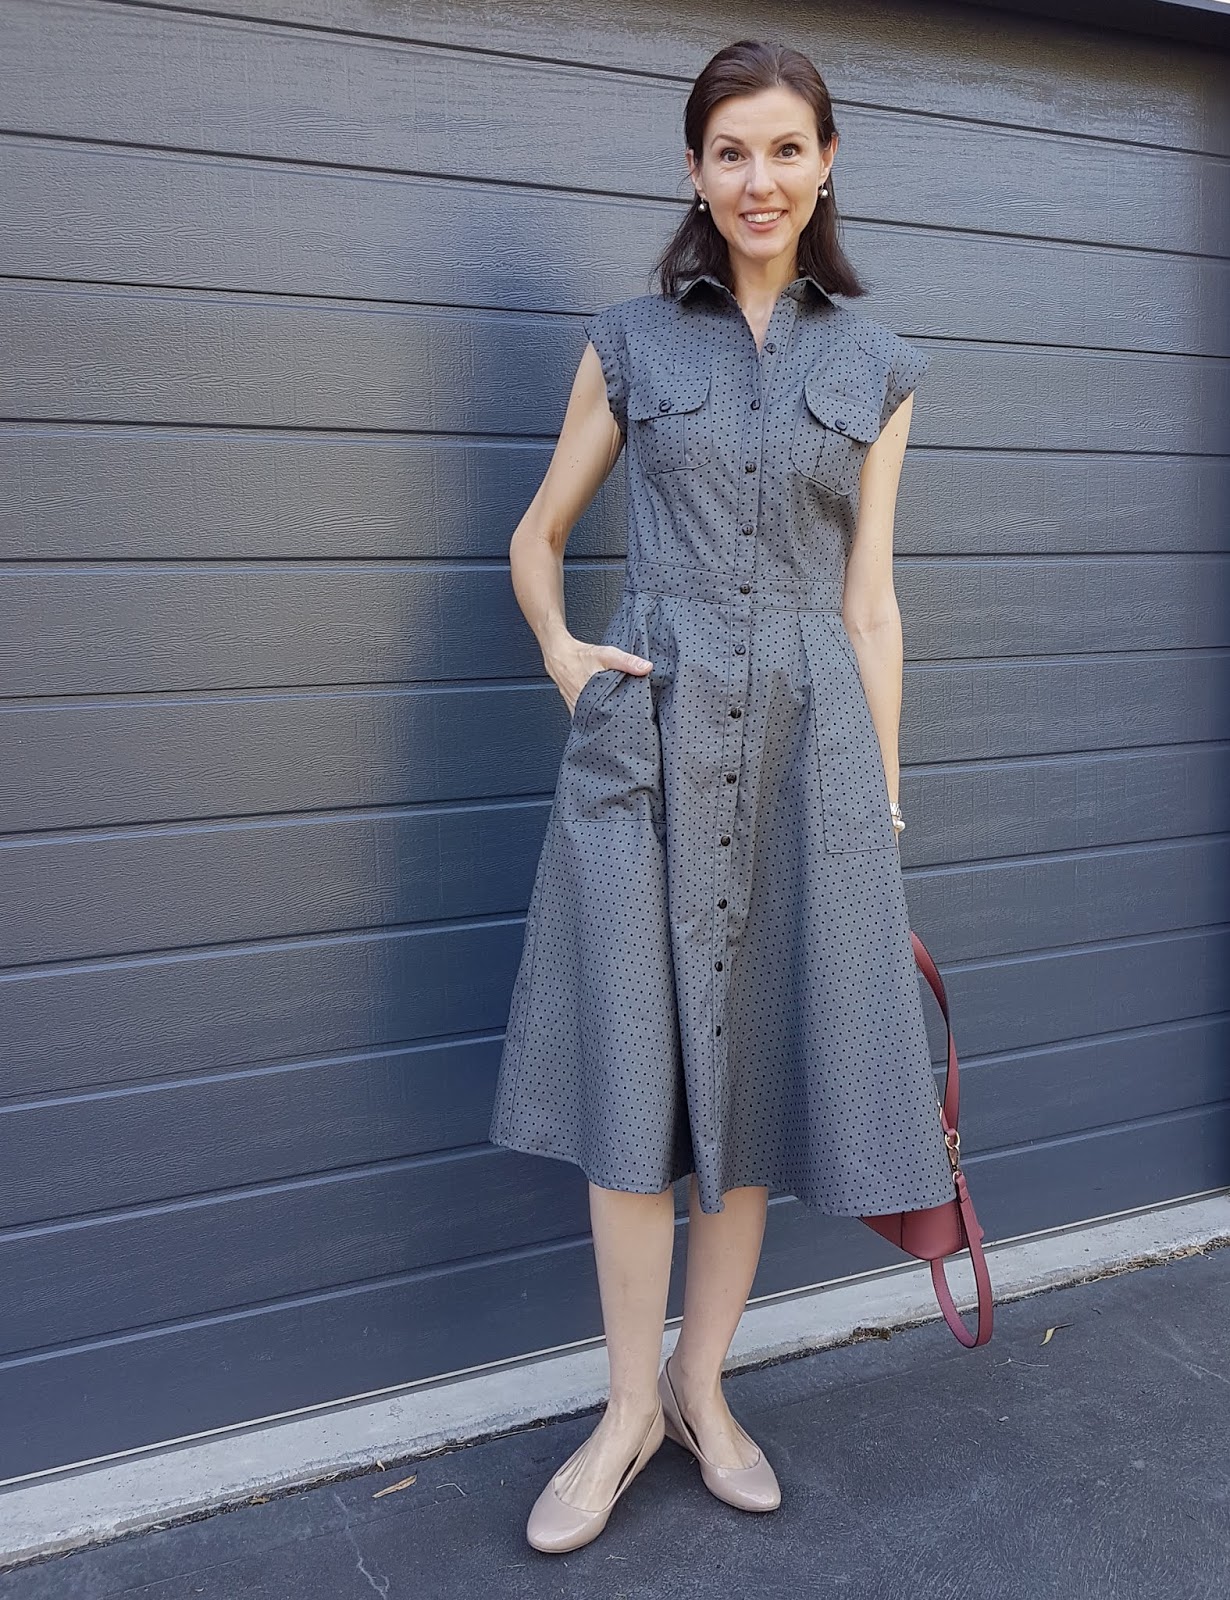
Left: you can see my uneven shape
Right: how I always stand to even up my hips!

Saturday, 26 August 2017

Bespoke Blazer Review / Pattern Test

Okay, so if you follow me on insta you know that my review of the Bespoke Blazer by Sew To Grow (released 25th Aug.  2017) can be summed up in two words...

LOVE IT!

I really do.  It's an easy make & such an amazing result for something that comes together so quickly. 

For those of us on team tall it was simple to make alterations.  I added 7cm to the sleeves and 5cm to all body pieces.  For reference, I made a size xs.

I love the burrito method for enclosing the side seam, it's an amazing sewing slight of hand trick!

I have already made 2 Bespoke Blazers and am about to make my 3rd!  I'll be starting a support/enabling group on insta using #bespokeblazer

As a Mama, jeans & a tee are my standard uniform for all seasons.  Adding a blazer elevates that look and makes me feel a little more put together.  It also gives me a chance to play with colour & pattern over my standard black on black or white on denim look.

I have tested most of the patterns by Lindsey at Sew To Grow and am going to go out on a limb and say it's her best pattern to date.  Can I say that without detracting from her other patterns?!  I hope so!

This is not a paid endorsement, I just really love this pattern!  It's beautiful and works for all of our diverse body types.

Hurry to buy your copy now, you can get a discount this weekend only!

Happy Sewing!

LOVE the curved hem!

Meeting the fab Lindsey from Sew To Grow,
both of us in our Bespoke Blazers!